Trezor.io/start — Complete Beginner Setup Guide for 2025
A fully detailed, beginner-friendly walkthrough for setting up your Trezor Wallet, securing your crypto, and mastering the basics of safe crypto storage.
What Is Trezor.io/start?
The official onboarding portal at Trezor.io/start is the trusted place to begin your Trezor hardware wallet setup. It provides verified downloads, guidance for initializing your device, and essential security best practices for storing crypto safely. Whether you hold Bitcoin, Ethereum, stablecoins, or long-term investments, this is the safest starting point.
Hardware wallets like Trezor are designed to protect your private keys by keeping them offline, away from malware and online exploits. If you’re transitioning from exchanges or hot wallets, Trezor gives you true ownership and self-custody.
Why Trezor Remains a Top Hardware Wallet
Trezor devices are engineered with open-source software, transparent security layers, and user-friendly firmware that makes crypto safety approachable. The combination of offline key storage, physical confirmation, encryption, and high-grade hardware makes Trezor ideal for both beginners and seasoned crypto investors.
🔐 Cold Storage Security
Your private keys never leave the device—making it immune to remote hacking attempts.
📖 Open-Source Firmware
Community-reviewed and transparent, offering trustworthy cryptographic protection.
🧩 Multi-Asset Support
Supports Bitcoin, Ethereum, Solana, Litecoin, stablecoins, ERC-20 tokens, and more.
How to Set Up Your Trezor via Trezor.io/start
Step 1: Visit Trezor.io/start
Type the URL manually into your browser to avoid counterfeit websites or phishing pages. This is the official and safest destination.
Step 2: Download & Install Trezor Suite
Choose the right version for Windows, Linux, or macOS. Trezor Suite is the central dashboard for managing your crypto accounts and signing transactions.
Step 3: Connect Your Trezor Device
Plug in your Trezor Model One or Trezor Model T using the USB cable. Follow the on-screen prompts to begin initialization.
Step 4: Create Your PIN & Backup Your Recovery Seed
Your 12–24 word seed phrase is the master key to your crypto. Physically write it down on paper or metal backup sheets and store it offline.
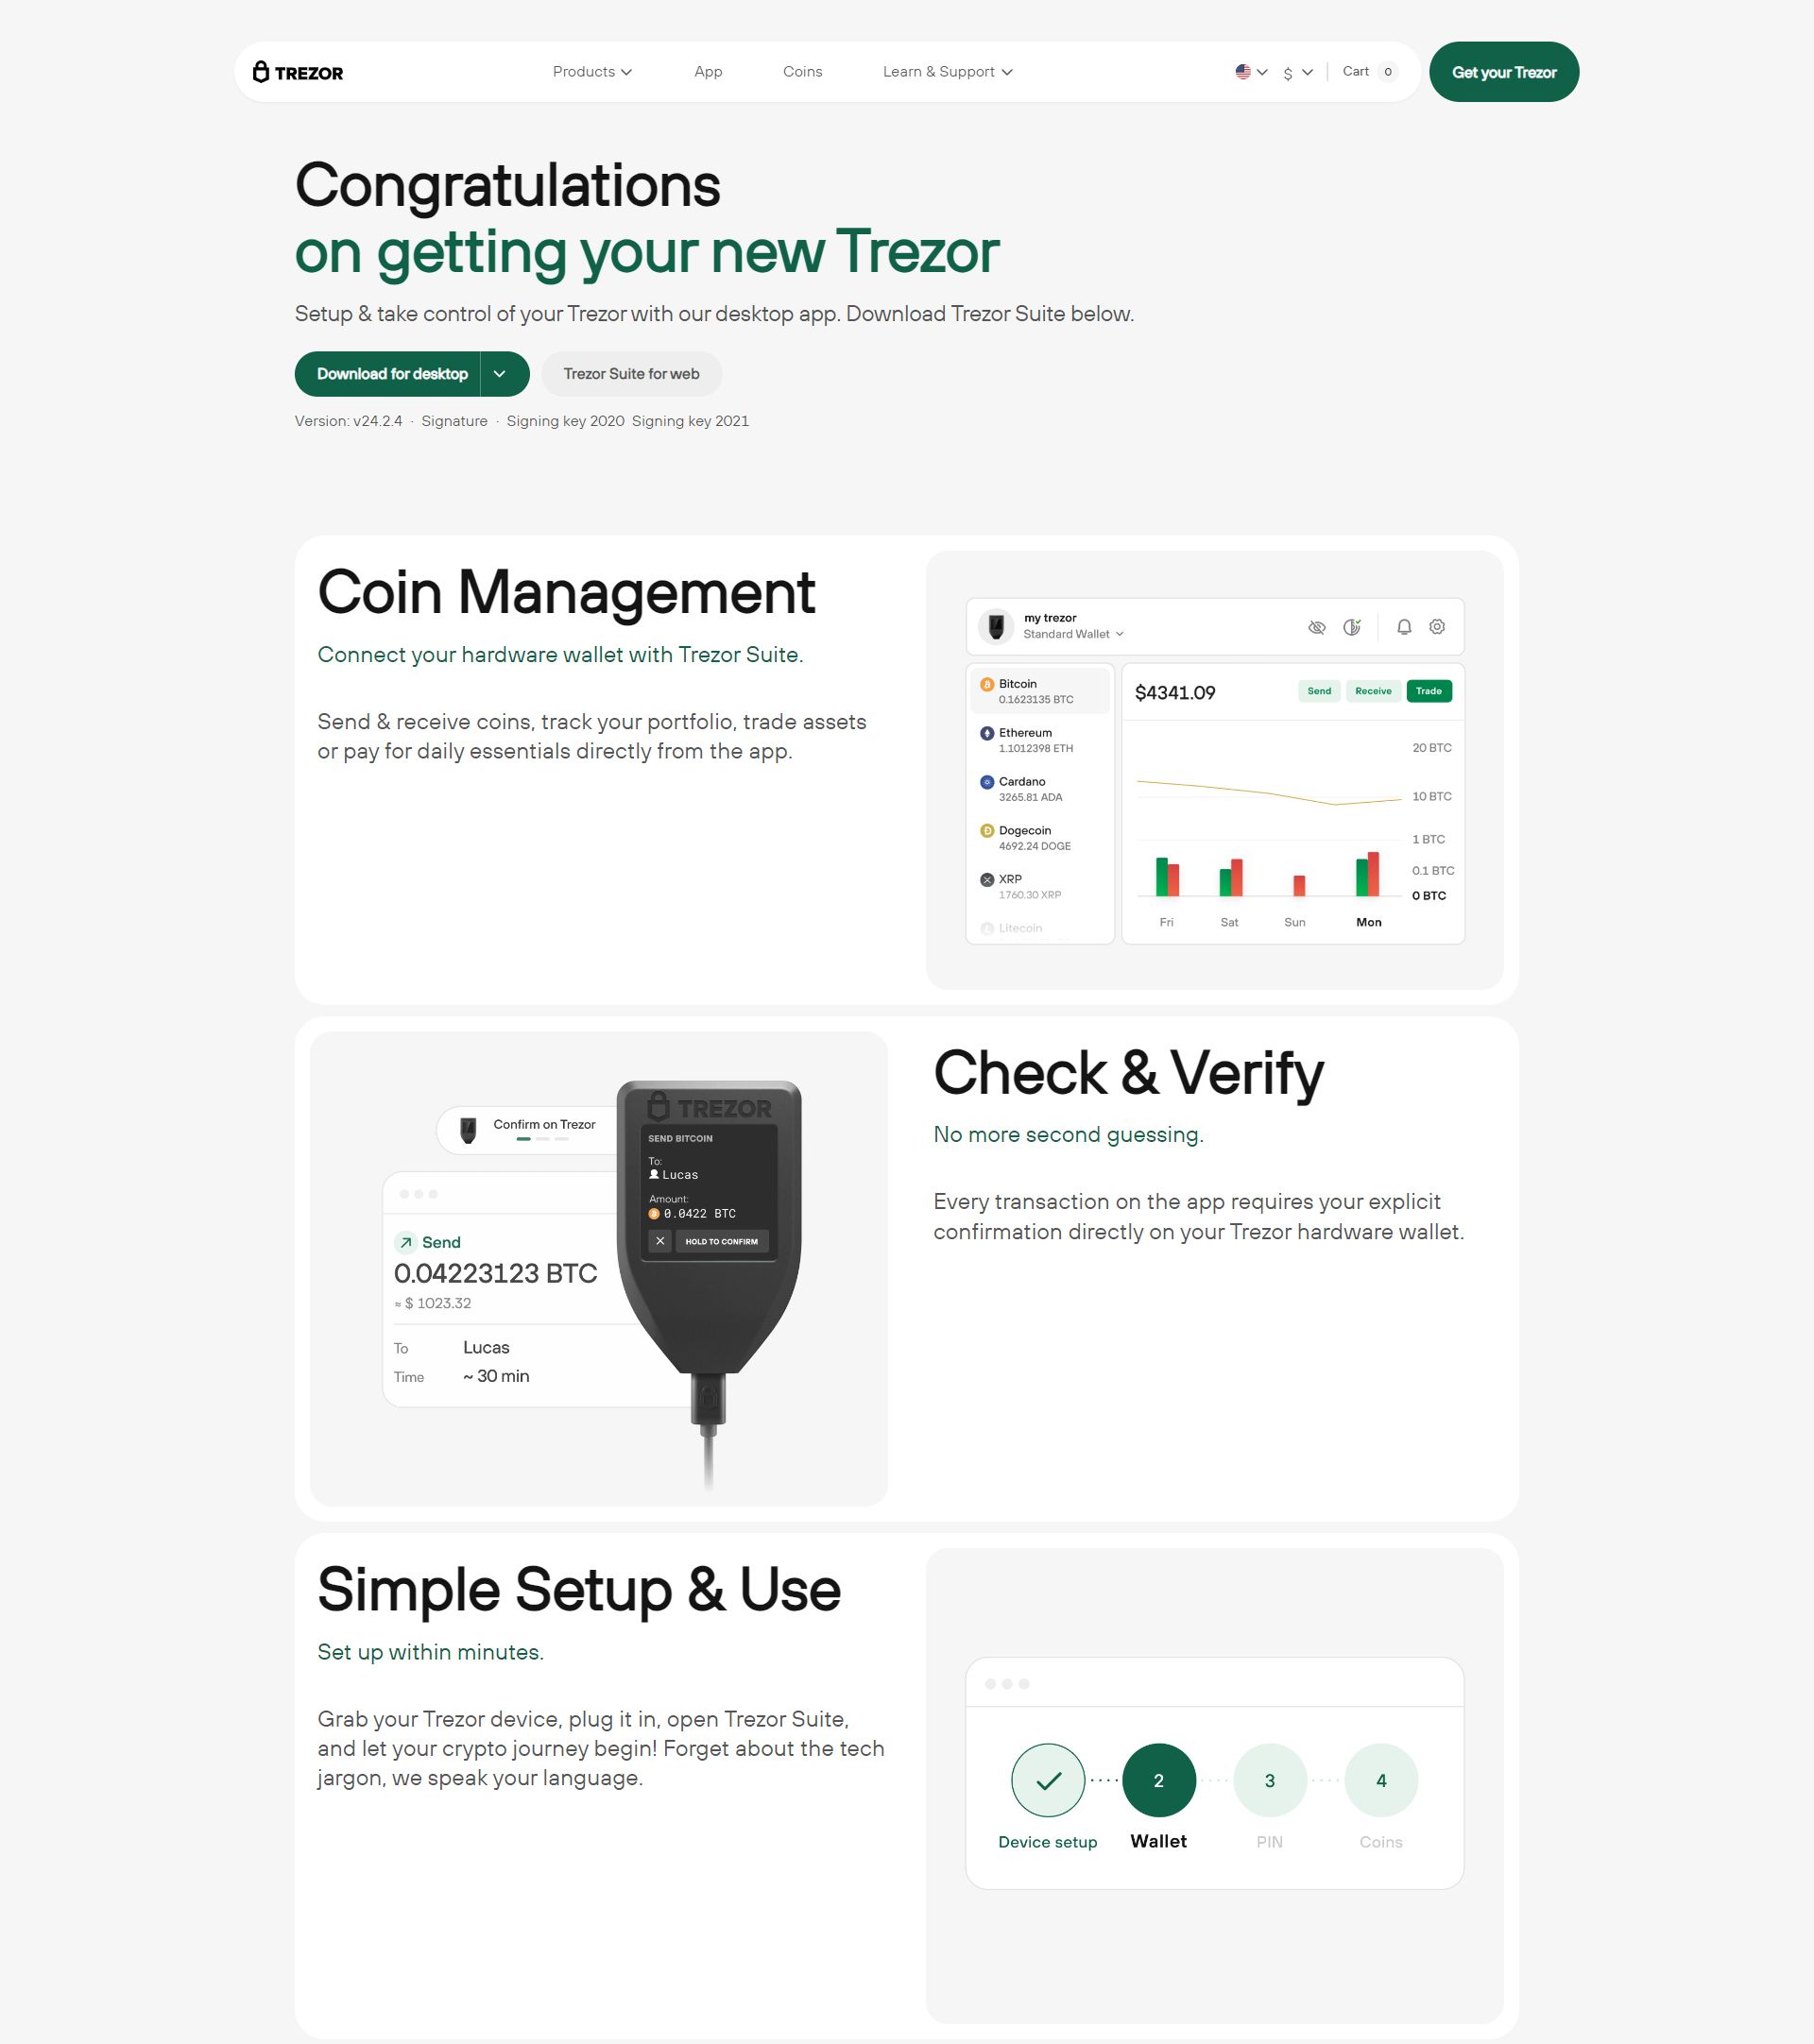
Step 5: Add Coins & Begin Managing Your Portfolio
Add Bitcoin, Ethereum, USDT, ADA, or other supported assets to your Suite dashboard. Every send/receive action requires physical confirmation on the device.
Trezor Model One vs Trezor Model T — Comparison Table (2025)
| Feature | Trezor Model One | Trezor Model T |
|---|---|---|
| Touchscreen | No | Yes |
| Supported Assets | 1,800+ | 1,800+ |
| Security Level | High | Very High |
| Ideal For | Budget Users & Crypto Beginners | Power Users, Traders, Long-Term Investors |
Top Security Tips for Trezor Users
- Never store your recovery seed online or in digital notes.
- Type the official website manually each time: Trezor.io/start.
- Confirm every transaction physically on your device screen.
- Use passphrase protection for an additional security layer.
- Update firmware regularly through Trezor Suite.
Frequently Asked Questions — Trezor.io/start
Is Trezor.io/start the official setup page?
Yes. Always manually type the URL to avoid fake websites.
Can someone restore my wallet without the seed phrase?
No. The seed phrase is the only way to recover your crypto. Never share it.
Can I use Trezor to store NFTs?
Yes. Supported blockchains allow you to store and track NFTs securely via Trezor Suite + third-party integrations.
Start Safely with Trezor.io/start
Your crypto deserves the highest level of protection—and Trezor provides exactly that. With offline key storage, open-source firmware, and trusted setup instructions from Trezor.io/start, you can take full control of your digital wealth with confidence.
Whether you're a Bitcoin holder, a DeFi user, or a multi-chain investor exploring new assets, Trezor ensures your financial freedom stays in your hands—securely and privately.